Monday 7 May 2007
the build 1
Thursday 3 May 2007
Update
I thought I would just update everyone of my progress at this point in the build as some more parts arrived today. The parts were some felts for the strap buttons. They were meant to arrive with all the other parts but was accidently forgotten. WD music were really good and sent it next day which was much appreciated.
Anyway... At the mo I have pretty much finished the neck and head but i still am going to give it a few more coats to shine it up some more. I read somewhere that brasso is also good for getting a good shine so i might try that.
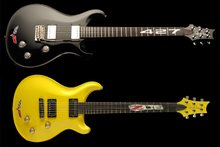
The body has colour on everyside except the top as i wanted to stain it balck like a prs grey custom. Unfortunatly the top on my kit had a line on it which i tried to remove with the sander but the venneer was soooo thin i went straight through it! bugger! I considered what i could do about it and these were the options:
1) do the top in a solid colour (super glossy black i think)
2) stain the top as planned and cross my fingers
3) stain the top and do a solid 'burst' around the edges to hide the patch-ive not seen a guitar done like this so it may look rubish
4) try and cover it with a graphic of some kind-only prob is it is in a weird place on the guitar and right on an edge
Ill have to think this over some more
I still also have to:
1)get the screws for the neck plate or buy a new neck plate
2)treat the fret board
3) come up with some graphics-i have ben researching modern tatoo style art which i could put on water slide transfer paper like what is used for model planes etc
4)re-wet and dry the body and give it some more colour and lacquer coats
5)on the neck lightly wet and dry and re lacquer
At the mo I have put all the parts on so i can judge how its looking and if it needs anything else. Im think all white graphics.
Tuesday 1 May 2007
New parts
Painting
1)First I sanded the headstock back to wood by hand so I didnt lose the contours of the neck. I used a really rough to start with and once I had removed the sanding sealer I used really fine wet and dry.
2)Next I masked the sides as I only wanted the top black and the rest blonde. I deliberatly left about a 5mm gap all round so that the spray paint would go over the sides slightly.
3) I bought a can of Halfords grey car primer and sprayed on two coats.
4) I then lightly sanded this with the fine wet and dry paper.
5) I then sprayed on the black (also halfords but this time gloss). I then gave it another coat before sanding with wet and dry.
6) Once I had sufficeint layers of black and it was even I removed the masking tape.
7) Using a new craft knife I scraped the 5mm over hang at the edges so that it was flush with the top.
8) I also re-sanded the sides to make sure they were clean from paint.
9) I the sprayed 1 coat of gloss lacquer (again halfords car paint)and wet and dry again
10) another coat of lacquer
11) clear lacquer the rest fo the neck.
..and hey presto!!!!!!!
The head stock
At the weekend I returned to my parents where I could blag the electric sander and begin work on the headstock. The frst thing I did was to buy new paper for the electric sander, a pack of assorted wet and dry paper, a curved file and some spray paint.
the first task was to design the headstock shape. I got a pencil and drew striaght onto the wood. i spent about an hour trying to get it just right. I decided upon a curve simular to a real PRS but as the sides of the head are different my curve had to be different too. I didnt really want a straight copy anyway.
Next i got a coping saw out and cut along the line I had drawn. I lightly sanded it and then attacked it with the file (curve side) as I wanted a more 3d shape.
Next to painting!!!!!!! hoorah!
Subscribe to:
Posts (Atom)